Nginx的访问记录查看
默认的nginx的访问记录在/usr/local/nginx/logs/access.log中查看

自定义的日志文件可以改变文件名和路径,原始的access_log的配置在nginx.conf中注释掉了。在nginx.conf中新增以下命令【access_log logs/my.log; 】就会出现新的日志记录文件
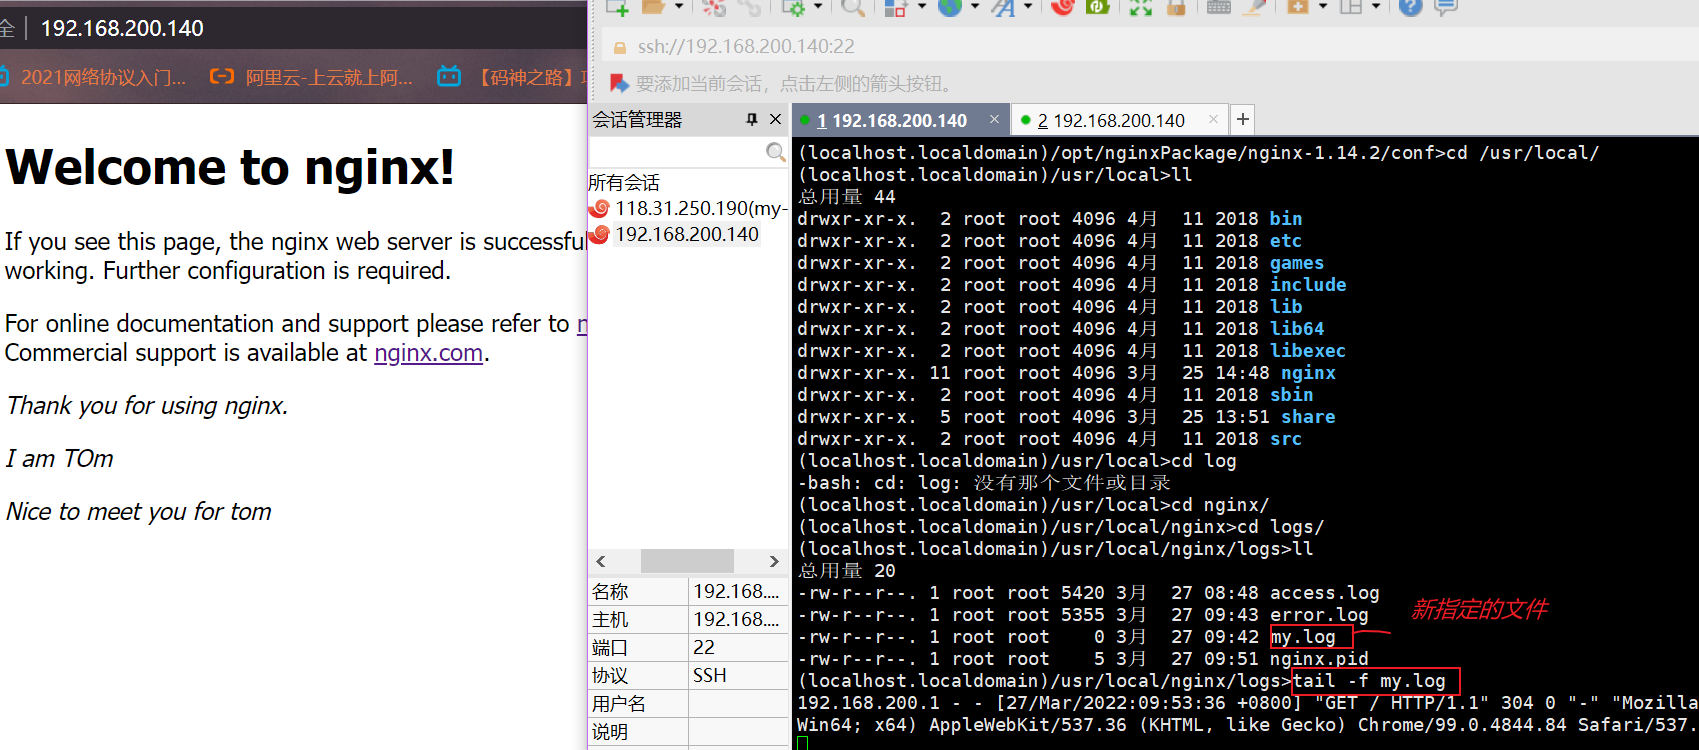
Nginx服务器支持对服务日志的格式、大小、输出等进行设置,需要使用到两个指令,分别是access_log和log_format指令。
(1)access_log:用来设置用户访问日志的相关属性。
| 语法 |
access_log path[format[buffer=size]] |
| 默认值 |
access_log logs/access.log combined; |
| 位置 |
http, server, location |
(2)log_format:用来指定日志的输出格式。
| 语法 |
log_format name [escape=default|json|none] string….; |
| 默认值 |
log_format combined “…”; |
| 位置 |
http |
配置log_format的内容会,改变访问日志的输出的内容和格式,如下图
1
2
3
4
5
6
7
8
9
10
11
12
13
14
15
16
17
18
19
20
21
22
23
| http {
include mime.types;
default_type application/octet-stream;
sendfile on;
keepalive_timeout 65;
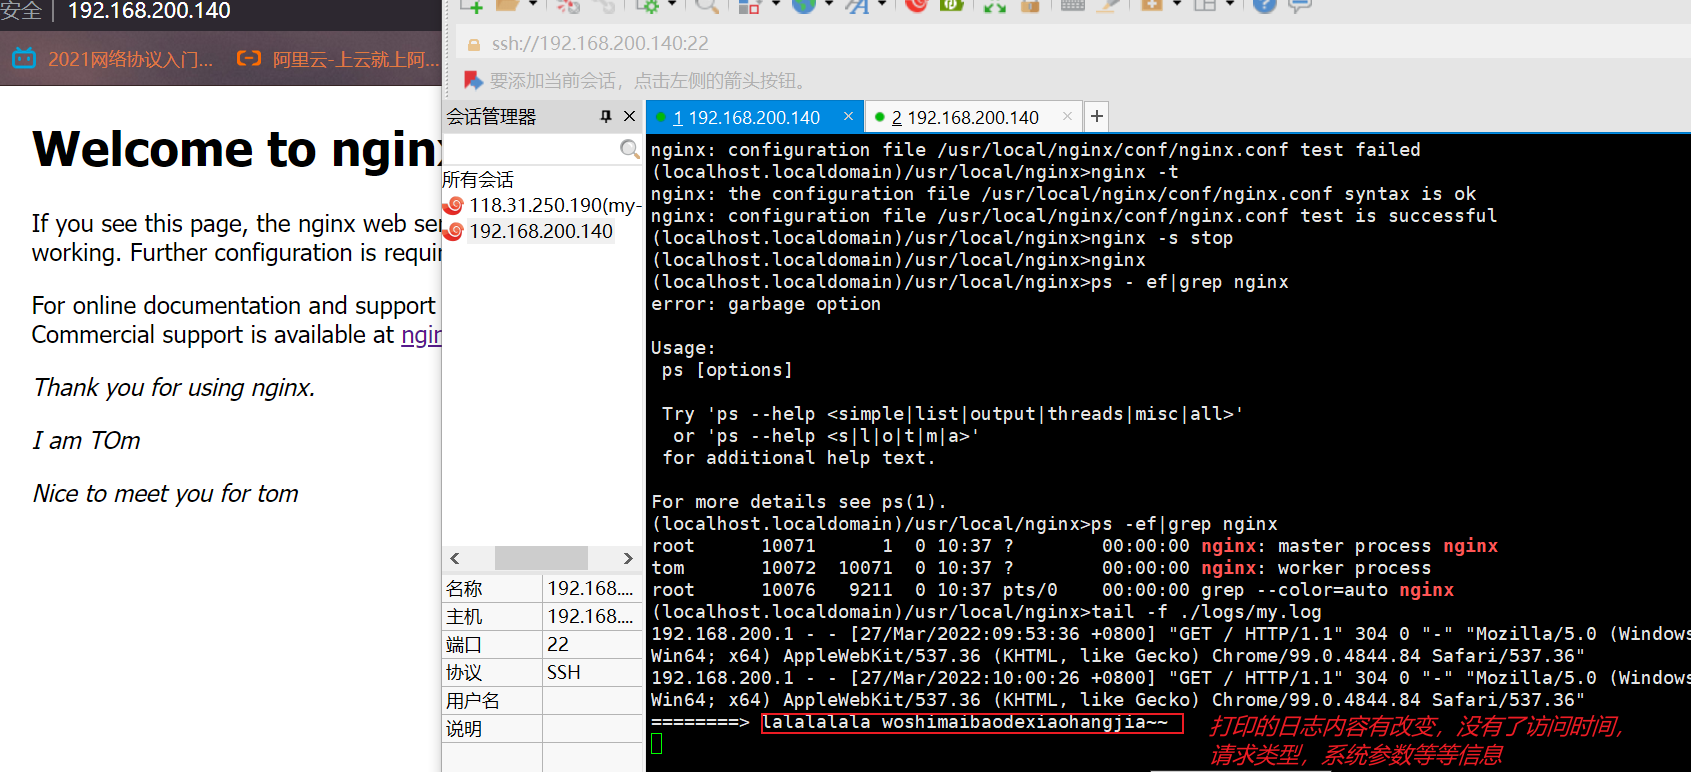
log_format myformat '========> lalalalala woshimaibaodexiaohangjia~~';
access_log logs/my.log myformat;
server {
listen 80;
server_name localhost;
location / {
root /home/tom/html;
index index.html index.htm;
}
}
}
|
可是nginx日志内容是瞎写的,怎么才能又看到自定义的信息又能看到以前默认的信息呢【就是 log_format main】。
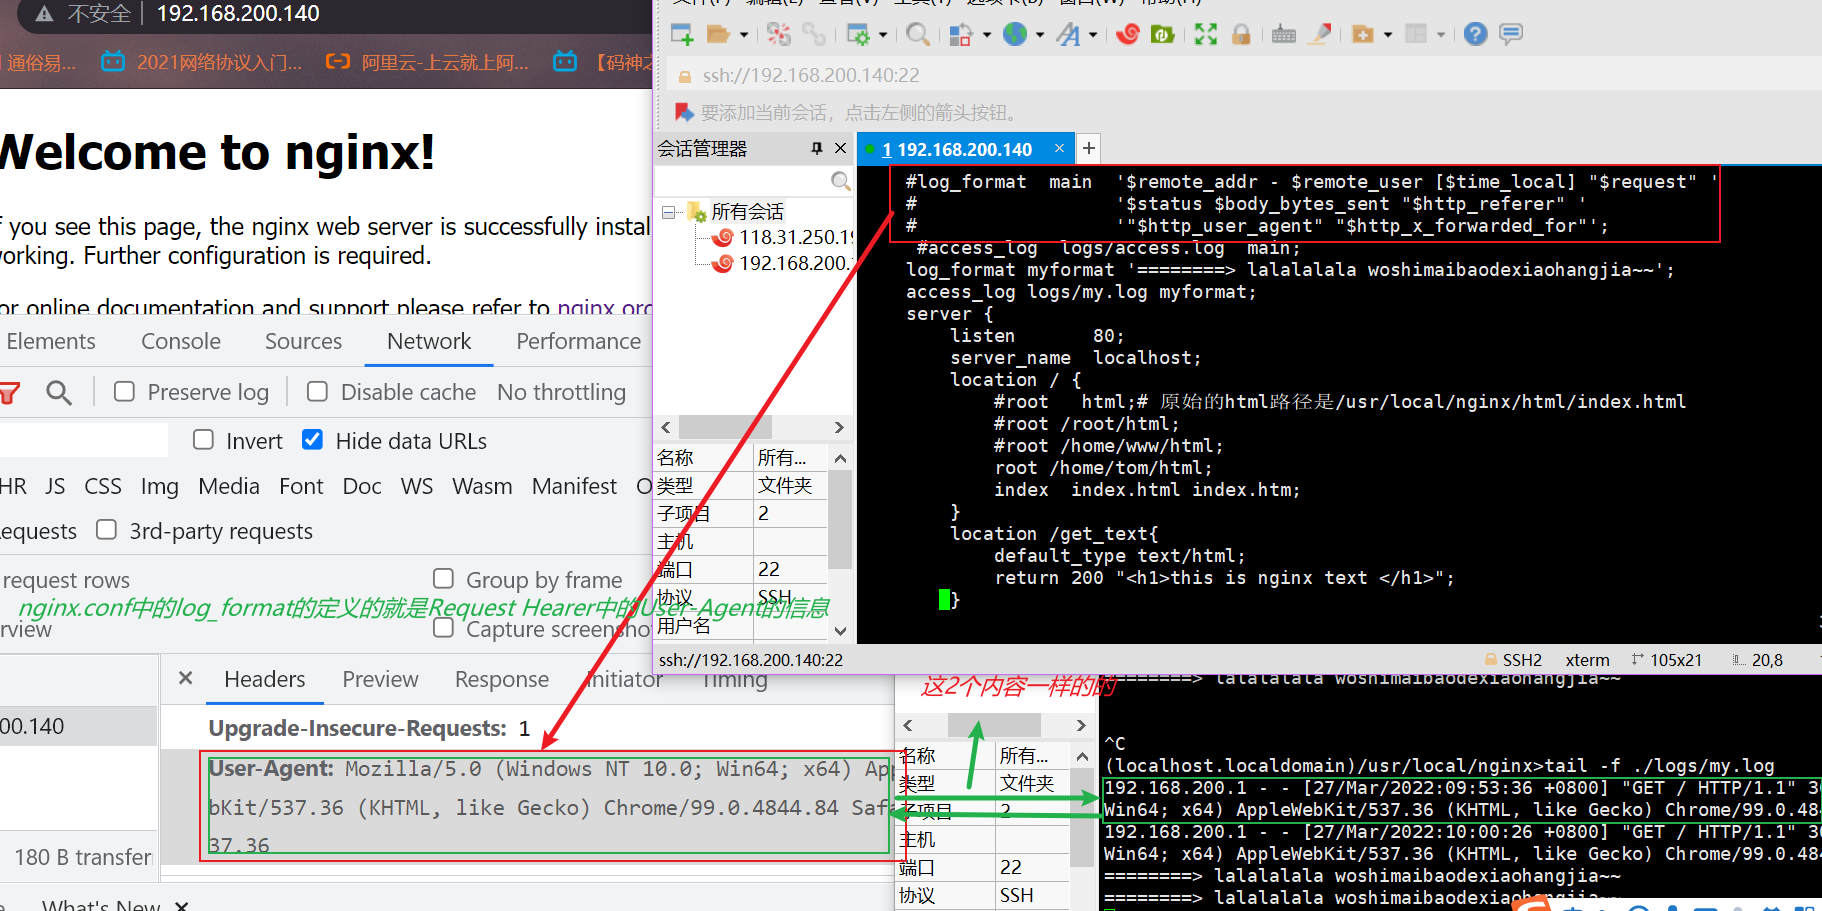
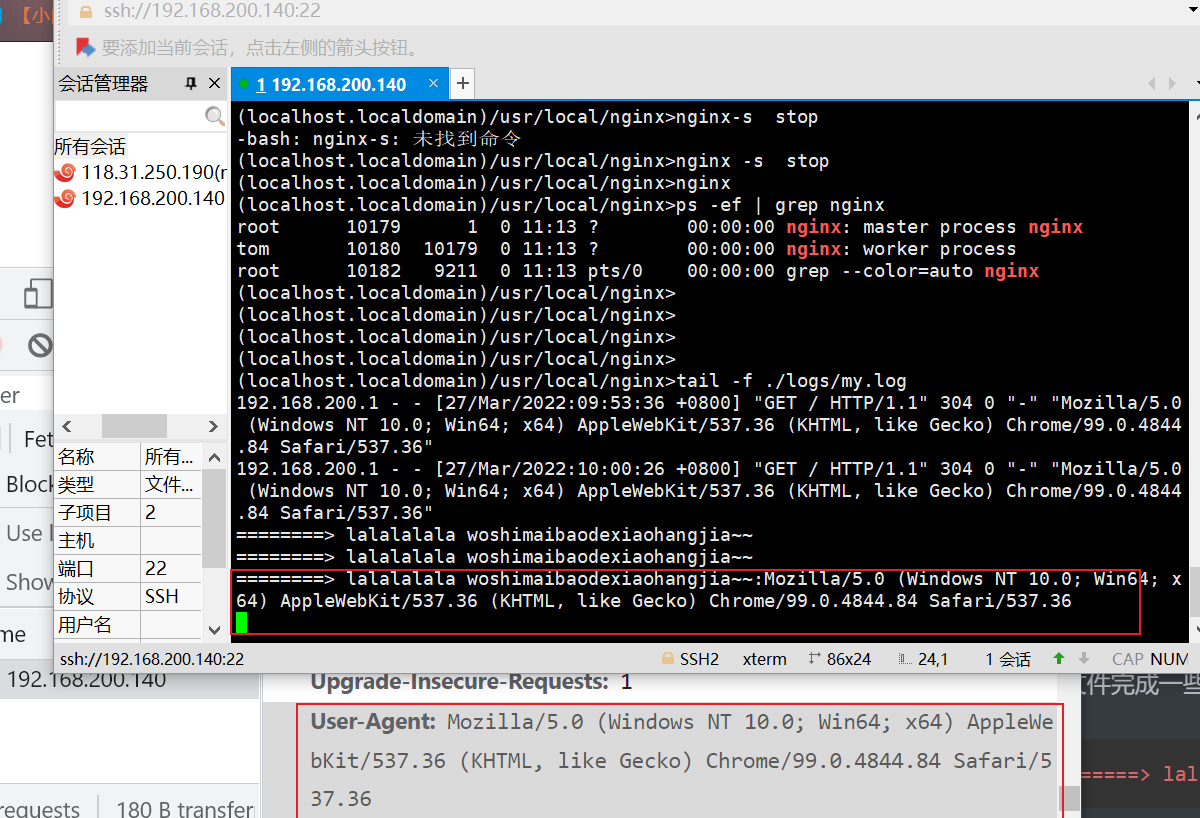
其实浏览器的User-Agent的内容就nginx的内置变量【http_user_agent】。可以在myformat中加入$http_user_agent变量就能是日志文件完成一些了。
1
| log_format myformat '========> lalalalala woshimaibaodexiaohangjia~~:$http_user_agent';
|
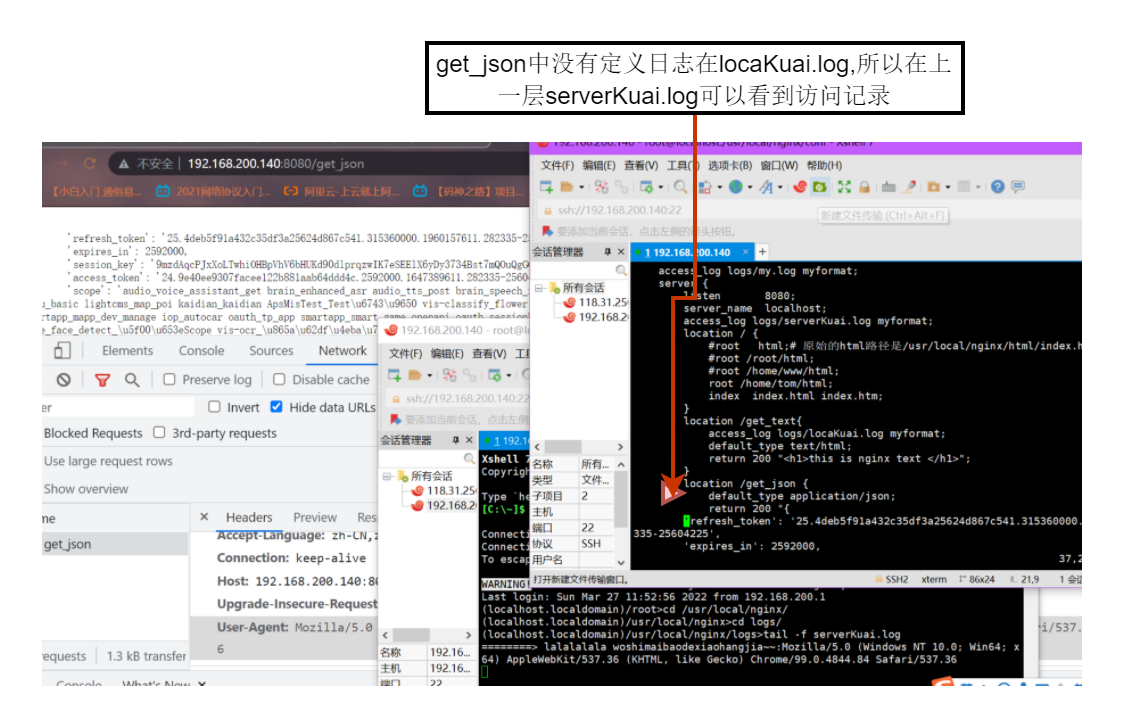
因为access_log不仅在http块中,也写在server块和location块中。设置不同区域的access_log,在tail日志文件的时候就有不同的反应。
1
2
3
4
5
6
7
8
9
10
11
12
13
14
15
16
17
18
19
20
| access_log logs/my.log myformat;
server {
listen 8080;
server_name localhost;
access_log logs/serverKuai.log myformat;
location / {
root /home/tom/html;
index index.html index.htm;
}
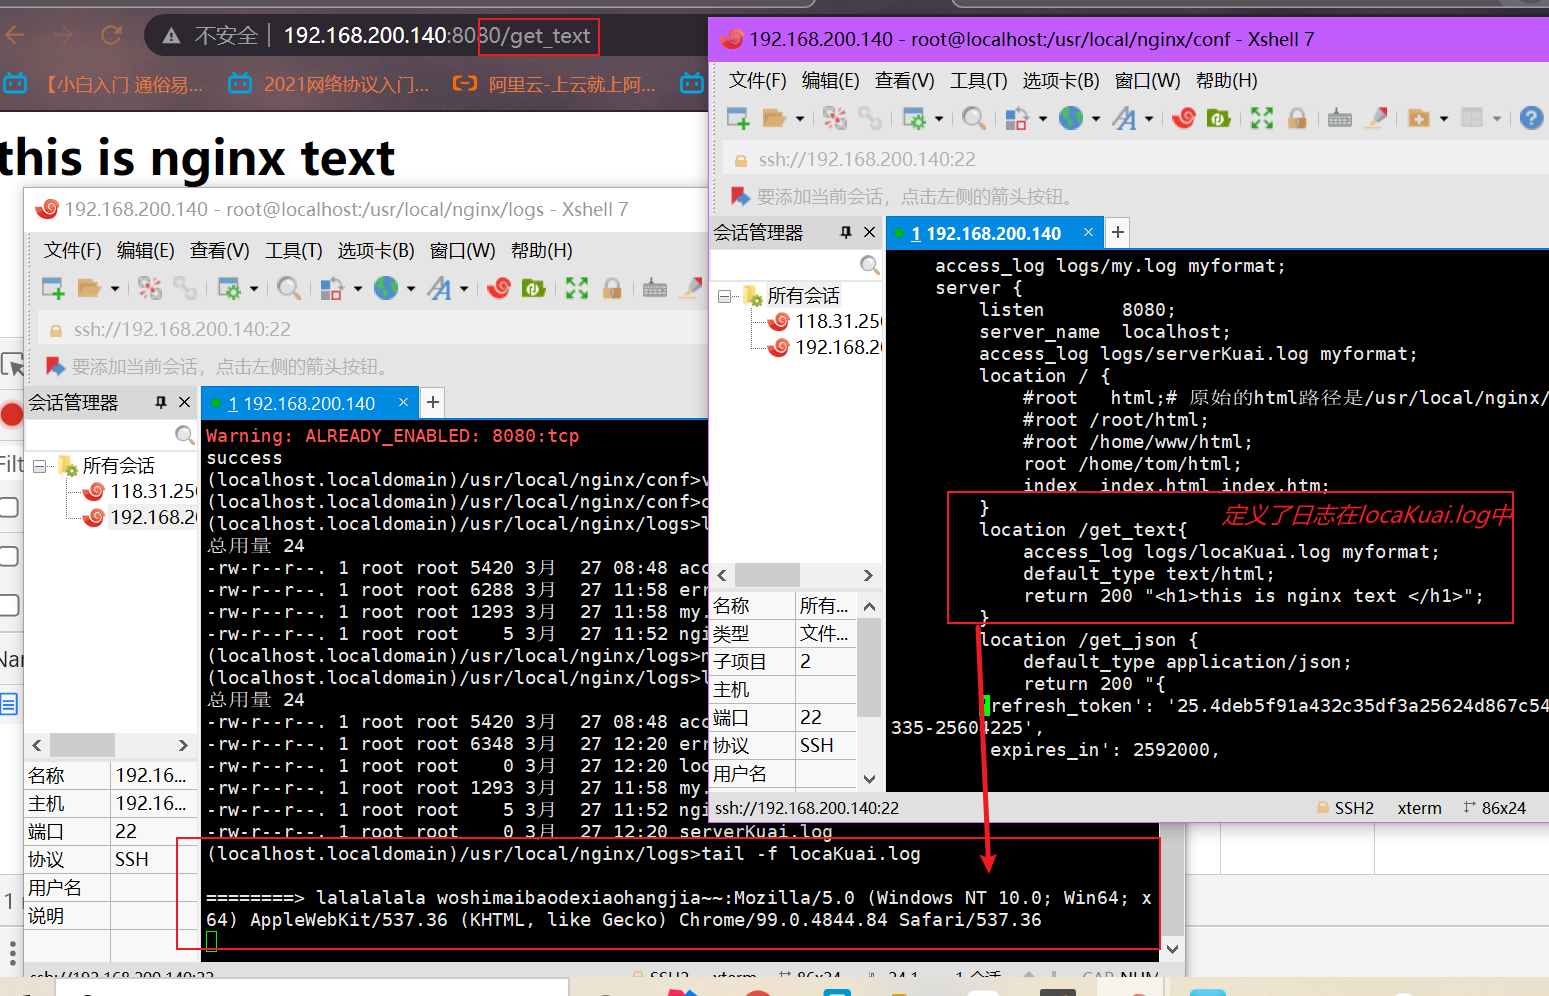
location /get_text{
access_log logs/locaKuai.log myformat;
default_type text/html;
return 200 "<h1>this is nginx text </h1>";
}
location /get_json {
default_type application/json;
return 200 "{ 。。。。
|
保存nginx.conf然后重启nginx。进入logs文件夹发现多了2个文件
1
2
3
4
5
6
7
8
9
| (localhost.localdomain)/usr/local/nginx/logs>nginx -s reload
(localhost.localdomain)/usr/local/nginx/logs>ll
总用量 24
-rw-r--r--. 1 root root 5420 3月 27 08:48 access.log
-rw-r--r--. 1 root root 6348 3月 27 12:20 error.log
-rw-r--r--. 1 root root 0 3月 27 12:20 locaKuai.log --->newCreate
-rw-r--r--. 1 root root 1293 3月 27 11:58 my.log
-rw-r--r--. 1 root root 5 3月 27 11:52 nginx.pid
-rw-r--r--. 1 root root 0 3月 27 12:20 serverKuai.log --->newCreate
|
当输入192.168.200.140:8080/get_text时,tail -f serverKuai.log时
;当输入192.168.200.140:8080/get_text ,tail -f locaKuai.log时
Nginx的include的用法
前面我们已经对Nginx服务器默认配置文件的结构和涉及的基本指令做了详细的阐述。通过这些指令的合理配置,我们就可以让一台Nginx服务器正常工作,并且提供基本的web服务器功能。
 需求如下:
1
2
3
4
5
6
7
8
9
10
11
12
13
14
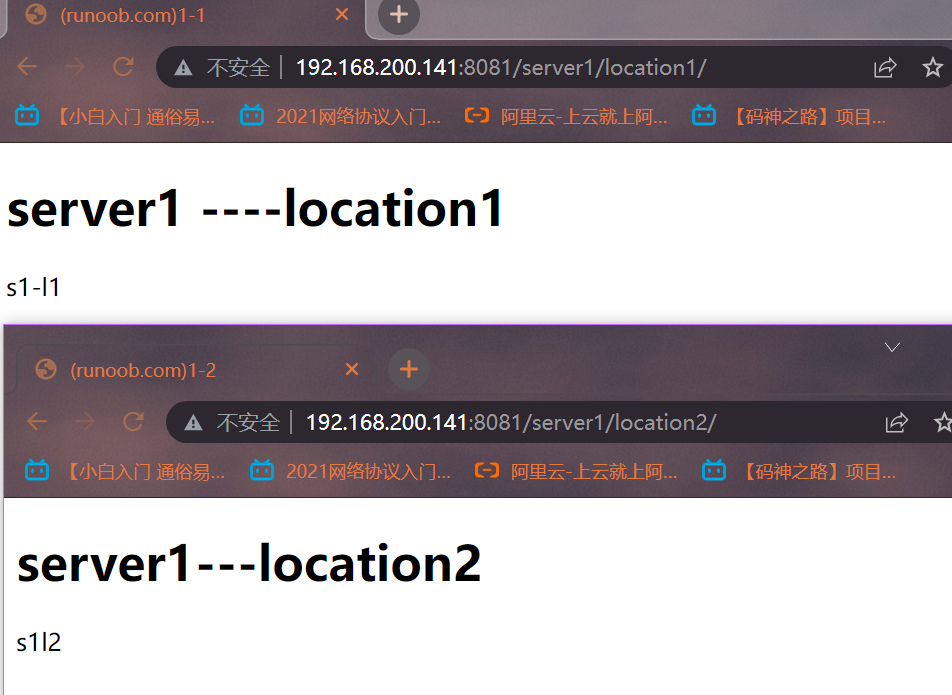
| (1)有如下访问:
http://192.168.200.140:8081/server1/location1
访问的是:index_sr1_location1.html
http://192.168.200.140:8081/server1/location2
访问的是:index_sr1_location2.html
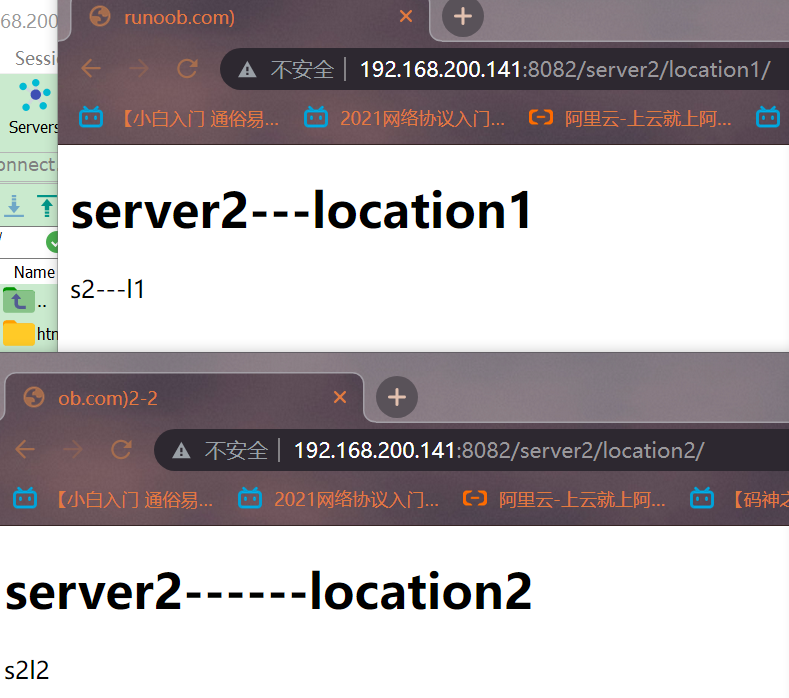
http://192.168.200.140:8082/server2/location1
访问的是:index_sr2_location1.html
http://192.168.200.140:8082/server2/location2
访问的是:index_sr2_location2.html
(2)如果访问的资源不存在,
返回自定义的404页面
(3)将/server1和/server2的配置使用不同的配置文件分割
将文件放到/home/www/conf.d目录下,然后使用include进行合并
(4)为/server1和/server2各自创建一个访问日志文件
|
我滴思路:现在/home/www/目录conf.d文件夹和myweb文件夹。conf.d文件夹里存放配置信息【理解成application.properties 或者 application.yml 或者 pom.xml】,而myweb里面存在资源和创建404.html文件【myweb可以理解成java的web项目的web资源】。如下
| server1 |
location1 |
index_sr1_location1.html |
| server1 |
location2 |
index_sr2_location2.html |
| server2 |
location1 |
Index_sr1_location2.html |
| server2 |
location2 |
Index_sr2_location2.html |

输入以下命令更新一下nginx.conf配置文件
1
2
3
4
5
6
7
8
9
10
11
12
13
14
15
16
17
18
19
20
21
22
23
24
25
26
27
28
29
30
31
32
33
34
35
| user www;
worker_processes 2;
events {
worker_connections 1024;
}
http {
include mime.types;
# '$status $body_bytes_sent "$http_referer" '
# '"$http_user_agent" "$http_x_forwarded_for"';
# 规定日志的内容和形式 只能在http块中
#access_log logs/access.log main; 规定日志的作用域 可以写在http\server\location 中
log_format server1 'this is ser1 1111:$http_user_agent';
log_format server2 'this is ser2 2222:$http_user_agent';
sendfile on;
#tcp_nopush on;
#keepalive_timeout 0;
keepalive_timeout 65;
include /home/www/conf.d/*.conf;
server {
listen 80;
server_name localhost;
#charset koi8-r;
#access_log logs/host.access.log main;
location / {
root html;
index index.html index.htm;
}
#error_page 404 /404.html;
# redirect server error pages to the static page /50x.html
error_page 500 502 503 504 /50x.html;
location = /50x.html {
root html;
}
}
}
|
home/www/conf.d/目录下的server11.conf 和server22.conf代码如下
1
2
3
4
5
6
7
8
9
10
11
12
13
14
15
16
17
18
19
20
21
22
| server11.conf
=============================================
server {
listen 8081;
server_name localhost;
access_log /home/www/myweb/server1/logs/server1.log server1;
location /server1/location1 {
root /home/www/myweb/ ;
index index_sr1_location1.html;
}
location /server1/location2 {
root /home/www/myweb/ ;
index index_sr1_location2.html;
}
error_page 404 /404.html;
# redirect server error pages to the static page /50x.html
#error_page 500 502 503 504 404 /50x.html;
location = /404.html {
root /home/www/myweb;
index 404.html;
}
}
|
1
2
3
4
5
6
7
8
9
10
11
12
13
14
15
16
17
18
19
20
21
22
23
| server22.conf
==============================================
server {
listen 8082;
server_name localhost;
access_log /home/www/myweb/server2/logs/server2.log server2;
location /server2/location1 {
//代表浏览器输入的地址 192.168.200.141:8082/server2/location1/
root /home/www/myweb/ ;
//
index index_sr2_location1.html;
}
location /server2/location2 {
root /home/www/myweb/ ;
index index_sr2_location2.html;
}
error_page 500 502 503 504 404 /50x.html;
location = /50x.html {
root /home/www/myweb/404.html;
}
}
|